


Latest update: May 20, 2025
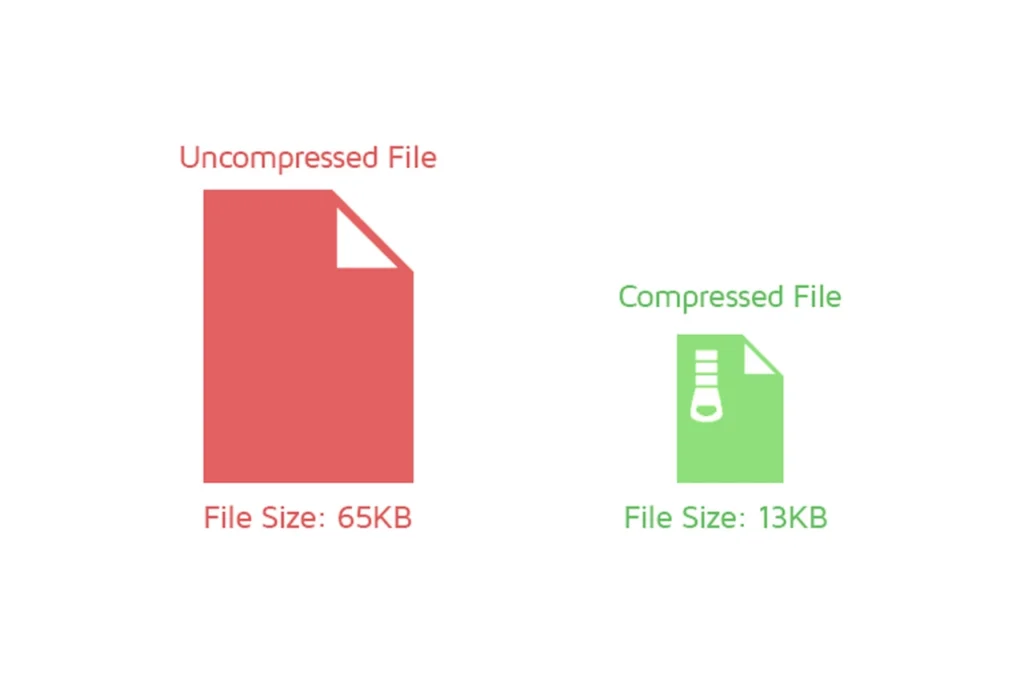
If you’ve ever zipped a file to make it easier to send, you’re familiar with the concept behind GZIP compression. It reduces file sizes to speed up data transfer—essential for faster page loads and better SEO.
In this post, I’ll break down what GZIP compression is and how it works. Plus, I’ll show you three simple ways to enable it on your website, including using a WordPress plugin and editing your .htaccess file.
What is GZIP?
GZIP is a popular data compression method used to reduce the size of files for faster web page loading. It compresses HTML, CSS, and JavaScript files, allowing browsers to load them quicker. By reducing file sizes, GZIP helps improve website performance and boosts SEO rankings, as page speed is a crucial factor in search engine algorithms. It’s widely supported by web servers and browsers, making it an essential tool for optimizing site efficiency.
How Does GZIP Compression Work?
It works by utilizing the DEFLATE algorithm, which identifies repeating patterns in data and replaces them with shorter representations, thus reducing the overall file size. This helps web pages load faster, improving user experience and SEO performance.
When a file is compressed with GZIP, two main techniques are employed: LZ77 (Lempel-Ziv) and Huffman coding. LZ77 eliminates duplicate strings in the data, while Huffman coding optimizes the size by replacing frequently occurring patterns with shorter codes. After compression, the result is a .gz file, which is significantly smaller and more efficient for web transfer.
Once a user accesses a compressed file, their browser automatically decompresses it. This process is seamless and occurs quickly, ensuring that the original content is displayed without delay. By enabling GZIP compression, websites can reduce loading times, improve performance, and lower server load, all of which contribute to better SEO rankings.
The Benefits of GZIP Compression
What is the main benefit of GZIP compression? – GZIP compression speeds up page load times by reducing file sizes.
By reducing the size of data sent between the server and the browser, it significantly speeds up page load times. According to Google, “As page load time increases from one to seven seconds, the probability of a visitor bouncing rises by 113%.” This leads to higher user engagement and reduced bounce rates. Additionally, GZIP optimizes bandwidth usage, decreases server load, and improves SEO rankings by enhancing page speed.
Why Use GZIP Compression Instead of Other Algorithms?
GZIP compression remains the preferred choice for web optimization due to its speed, efficiency, and broad compatibility. Using the DEFLATE algorithm, which combines LZ77 and Huffman coding, GZIP effectively reduces file sizes while maintaining fast compression and decompression speeds. This is crucial for web performance, as studies show that “53% of mobile users will leave a page that takes more than 3 seconds to load” (Google). Additionally, GZIP is supported by nearly all browsers and servers, ensuring seamless delivery and decompression of web content. As of 2025, 48.0% of all websites use GZIP compression, highlighting its reliability and widespread adoption.

While newer algorithms like Brotli offer slightly better compression ratios, they often require more processing power, which can slow down performance in real-world scenarios. GZIP strikes the perfect balance between compression efficiency and speed, making it an ideal choice for most web applications. Its lower computational overhead, ease of implementation, and extensive ecosystem support make it a practical solution for developers.
How to Check GZIP Compression?
If your site isn’t using GZIP, visitors may experience slower load times, higher bounce rates, and unnecessary data usage. Here are four easy methods to check GZIP compression.
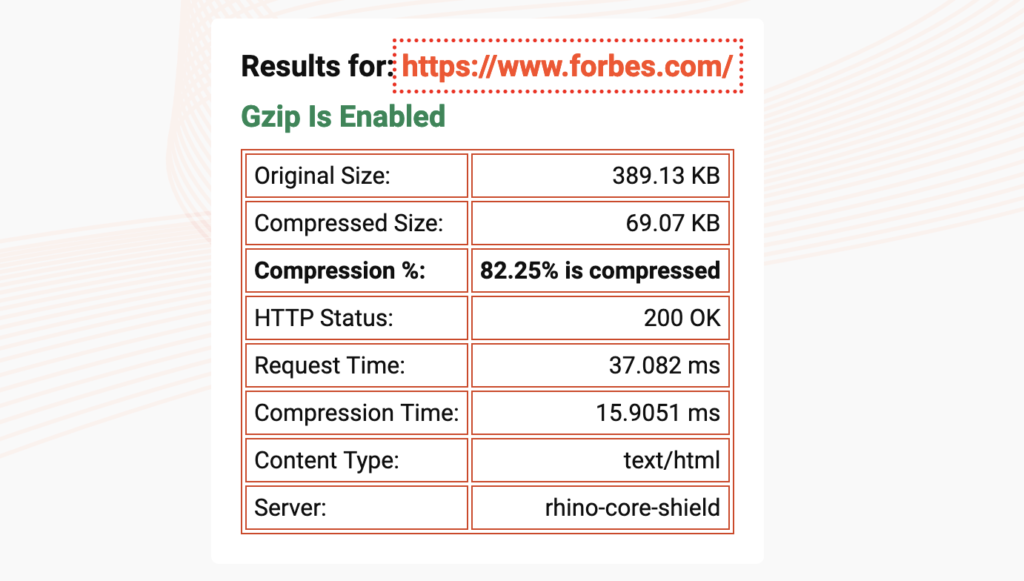
1. Use Online GZIP Compression Testing Tools
The easiest way to check GZIP compression is by using online tools that analyze your website’s response headers. Some reliable options include:
Simply enter your website URL into these tools, and they will confirm whether GZIP is active and provide recommendations for improvement.
2. Check GZIP Compression Using Browser Developer Tools
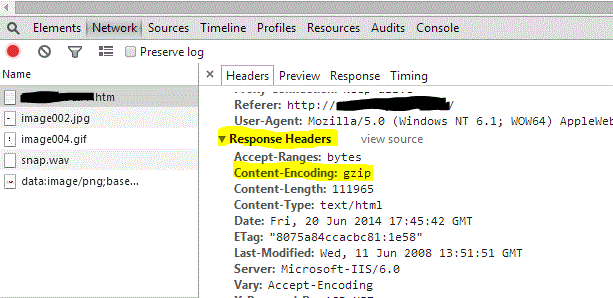
You can manually verify GZIP compression using Chrome DevTools or similar browser tools:
- Open Chrome DevTools (F12 or Ctrl+Shift+I on Windows, Cmd+Opt+I on Mac);
- Go to the Network tab and reload the page;
- Click on any resource (e.g., HTML, CSS, JS) and look under the Headers section;
- If GZIP is enabled, you’ll see Content-Encoding: gzip in the response headers.
3. Test GZIP Compression via Command Line (cURL)
For a more technical check, use the command line:
curl -I -H "Accept-Encoding: gzip" https://www.feedthebot.org/If GZIP is active, the response will include:
Content-Encoding: gzip4. Verify GZIP on Your Web Server
If compression isn’t enabled, check your server settings.
To verify if GZIP is enabled on Apache, add the following to your .htaccess file:
<IfModule mod_deflate.c>
  AddOutputFilterByType DEFLATE text/html text/plain text/xml text/css text/javascript application/javascript
</IfModule>
To verify if GZIP is enabled on Nginx, add the following to your nginx.conf file:
gzip on;
gzip_types text/html text/css text/javascript application/javascript;
How to Enable GZIP Compression on your Website?
For many, enabling GZIP compression involves appending specific directives to the .htaccess file on their hosting environment. This file, crucial for various website configurations, can be modified to instruct the server to compress files before they’re sent over to the browser. Here’s a snippet to include in your .htaccess for enabling GZIP:
<ifModule mod_gzip.c> mod_gzip_on Yes mod_gzip_dechunk Yes mod_gzip_item_include file \.(html?|txt|css|js|php|pl)$ mod_gzip_item_include handler ^cgi-script$ mod_gzip_item_include mime ^text/.* mod_gzip_item_include mime ^application/x-javascript.* mod_gzip_item_exclude mime ^image/.* mod_gzip_item_exclude rspheader ^Content-Encoding:.*gzip.*</ifModule>After implementing, validate the compression’s effectiveness using online GZIP tools. These platforms provide insights into the compression levels achieved and can help identify files that might not be optimally compressed.
Enable GZIP Compression on Apache Web Servers
Apache servers require the following directives for compression:
AddOutputFilterByType DEFLATE text/plainAddOutputFilterByType DEFLATE text/htmlAddOutputFilterByType DEFLATE text/xmlAddOutputFilterByType DEFLATE text/cssAddOutputFilterByType DEFLATE application/xmlAddOutputFilterByType DEFLATE application/xhtml+xmlAddOutputFilterByType DEFLATE application/rss+xmlAddOutputFilterByType DEFLATE application/javascriptAddOutputFilterByType DEFLATE application/x-javascriptEnable GZIP Compression on NGINX Web Servers
On NGINX servers, add these lines to your configuration:
gzip on;gzip_comp_level 2;gzip_http_version 1.0;gzip_proxied any;gzip_min_length 1100;gzip_buffers 16 8k;gzip_types text/plain text/html text/css application/x-javascript text/xml application/xml application/xml+rss text/javascript;gzip_disable "MSIE [1-6].(?!.*SV1)";gzip_vary on;Enable Compression on Litespeed Web Servers
For Litespeed servers, enable compression through the “tuning” section in the configuration settings, ensuring it’s activated and reviewing the available GZIP options for optimization.
Enable GZIP Compression in WordPress
Compressing your WordPress site’s data can be a bit of a hassle, but the good news is there’s an easy way to do it! All you have to do is use a plugin. There’s no need to mess around with code—it’ll be set up just the way you need it. Here are some useful plugins that can help you out:
- WP Rocket;
- W3 Total Cache;
- WP Fastest Cache.
How to Enable GZIP Compression with a Plugin, Step-by-Step:
- Log in to your WordPress dashboard;
- Go to Plugins > Add New;
- Search for your preferred caching plugin;
- Click Install, then Activate the plugin;
- Open the plugin’s settings and make sure GZIP compression is turned on.
GZIP Compression: A Free Way to Boost Website Speed
To put it simply, enabling GZIP compression is an easy and free way to make your website faster and improve its performance. By compressing large files like HTML, CSS, and JavaScript, GZIP reduces their size, making it faster for browsers to load and display content.
This not only enhances the user experience but also boosts your SEO rankings, as search engines prioritize fast-loading websites. Additionally, GZIP helps save bandwidth, reduces server load, and lowers hosting costs.


